Club Monaco, everyone's favorite Canadian clothes store, is having a…
To Do: Make Your Own Stationery
This is one of those craft projects where DIY does not translate to saving money. Custom designed and thermography-printed stationery isn’t cheap…but neither is stamping and printing your own. Luckily, it’s a lot of fun and the results are lovely!
Supplies
- Linoleum block, carving tool & roller (this starter kit is a great deal)
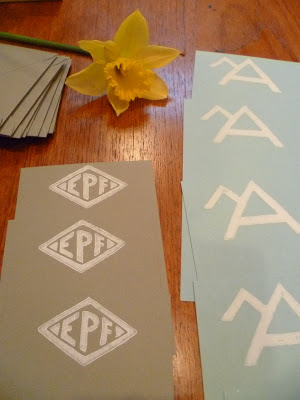
- White ink (I used the fabric ink, it’s nice and opaque)
- Flexible cutting board sheet
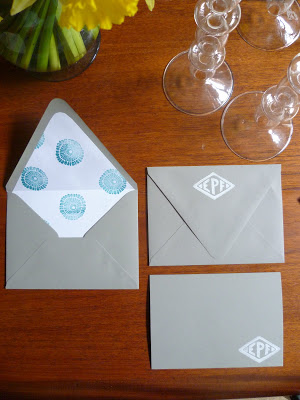
- Blank note cards and envelopes from PaperSource
- Envelope liner template kit
- Rubber stamps and ink pads for the liner pattern
- Sheets of plain white printer paper
- Glue stick
Draw your monogram design on a piece of paper cut to the size of your linoleum block. Outline the pattern in heavy pencil, flip over and copy on to the linoleum block by tracing the outline with pencil again. Once your design is transferred, copy it again in sharpie. Take a minute to check your design before you start carving. It should be backward and inverse (black lines will be the white of your stamp). Carve your stamp!
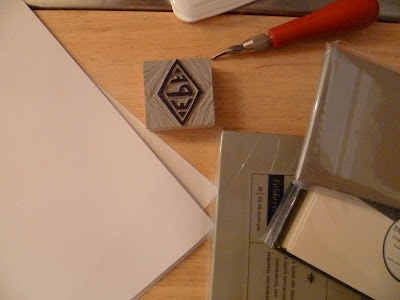
Once your stamp is done, pour out a tablespoon of ink on to the cutting sheet and spread it out with your roller. Do a couple test runs with the stamp and fix the carving as needed. Now you’re ready to print!
Be careful to remove the stamp slowly from the paper so you don’t get “whiskers” of ink on your design. Stop occasionally to wipe off your stamp with a paper towel. Set all your finished cards and envelopes out to dry.
Wash your ink supplies and stamp. While your cards are drying, stamp the sheets of printer paper with your liner designs. Use the plastic template to cut them out a few sheets at a time. Slide the liner inside the envelope, fold, glue and fold again (PaperSource has a video tutorial).
Voila! Your custom stationery is done. Margaret and I made 77 sets of notecards and envelopes on Friday. It’s definitely a project with efficiencies of scale. Once you’ve got the ink out, stamp everything in sight!

Next Post: Tarte’s Lip Stains
Previous Post: Ladies Activity Club: Kanzashi